Creating digital content is a real-world skill that benefits our students. Students can learn this skill by creating digital portfolios. Google Sites is a great tool for creating not only digital portfolios, but lesson or unit websites, class websites, family communication, and digital breakouts as well. I have been enamored of this tool since its current iteration dropped in Fall 2016. However, any tool is only as good as what it creates. Having seen Google Sites created by many members of my PLN, especially those focused on edtech, I have to share a hard truth:
We can do much better. I see too many sites created with Google Sites that are not visually appealing. A site can have valuable information but no one will read an unappealing website no matter how useful its content. When we work with Google Sites and expect students to create portfolios with this tool, we need to model good web design. We need to create something eye-pleasing if not eye-catching. Using Google Sites to create attractive web content is a very achievable goal for teachers and students. For an example of a beautiful website made with Google Sites, please have a look at Kris Armijo’s edtechforward.com.
But I’m not a professional web designer! Don’t worry. Here are some simple design tips to raise your Google Sites game.
Professional Photography for Site Banners and Imagery
The most effective way to incorporate good design into a website is professional photography. Do you possess neither professional photography skills nor equipment? No problem! Use Unsplash to find and use professional photos. The image at the top of this post comes from Unsplash. This website does not require users to cite them though you should. More on that later. Another great source for copyright-friendly imagery is the Wikimedia Commons. When making a Google Site for a lesson, use Wikimedia Commons images to tell the content’s story. Think about the Crash Course history series. Besides the Thought Bubble animations, all Crash Course does is use copyright friendly images to tell a story. Google Sites is the perfect platform for doing the same thing with websites.
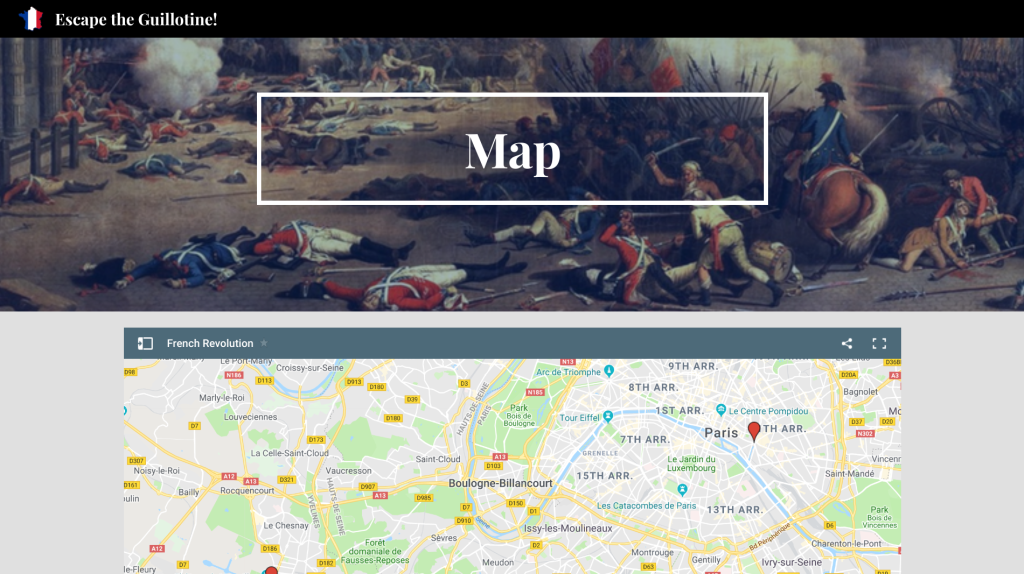
Images are best used for site banners. As of 2019, large banner images are in style. Try a large image and see how it looks as a cover or large banner. One word of caution – an image that is too small will look pixelated as a cover or large banner.

Here is an example of a Google Site that uses an Unsplash image as a banner:

Here is an example of a Google Site that uses a Wikimedia Commons photograph as a banner:

To ensure the banner image is uniform on all site pages, click on the home page in the Pages menu before clicking “New page.”

Readability Adjustment
Google Sites will default to adding a readability adjustment with banner images. Try different ways to display a title on a page. There is nothing wrong with leaving the banner image in place without any text, turning off the readability adjustment, and adding a title just below the banner.

Sometimes, it is best to have the title on the banner image and leave the readability adjustment turned on. Try each way and see which is most visually appealing.

The Footer
When using copyright-friendly professional photography, be sure to cite your sources. Use the Google Sites footer for this purpose. Add citations in a footer once and they appear on every site page. To add a footer, scroll to the bottom of any page and click this button:

This is the footer of Campfire Conundrum, my digital breakout that teaches heat transfer. I used an image from Unsplash for some design flair:

Make Text Pop with Color Contrast
To understand how color contrast affects web design, please have a look at some text:

Of these three choices, which is most visually appealing? Which choice makes the text pop? It is obviously Choice 3. Choice 1 is too dark against a black background. Choice 2 is too light against a white background.
There are easy free tools to ensure enough contrast between text and background. One is the WebAIM Color Contrast Checker. Use it to determine if there is enough color contrast. It even has sliders to help adjust colors until they have enough contrast.

The Colorzilla Google Chrome extension picks colors off websites and copies the exact color hex code to the clipboard. Paste the code into the WebAim Color Contrast Checker.

Another way to find a color and its hex code is to Google “color picker.”

Keep color contrast in mind when choosing a color in the Google Sites Themes menu.

For more information about making text pop with color contrast, please watch this video.
Organize Content with Layouts
The layouts option in the Google Sites Insert menu has made it easier to make multiple elements on a page work in harmony.

Here is the animated GIF of layouts in action from Google’s blog post announcing layouts:

Be careful when adding elements to a page. Having too many things on one page is not visually appealing. For a deeper dive into Google Sites layouts please read my blog post, Google Sites Layouts Vastly Improved My Digital Breakouts Site.
Link Pages with Buttons
Buttons are a good way to link to subpages on a site. They can work stacked vertically.

Buttons can also be laid across the screen horizontally.

One note about buttons in Google Sites: they are a rare instance where students should be encouraged to type ALL CAPS. Buttons are meant to pop. They simply do not unless they have ALL CAPS text.
The Key to Site Identity – Add a Favicon
Favicons give a site an identity. A favicon is a small logo that appears in a web browser tab. For example, have a look at the Google Sites favicon.

The Google Sites favicon is great. For Google Sites. It is not great for any website created with Google Sites. When users do not add a favicon, Google Sites defaults to the Google Sites logo favicon. That tells viewers nothing about the site! The good news is that adding a favicon to a Google Site is very easy. Simply click the three dots in the editor.

Create a favicon by creating a new Google Drawing. Set the dimensions to 512×512 pixels. Download the image as a .png file and use it as the site favicon. For a demonstration of adding a favicon to a Google Site using Google Drawings, please watch this video:
A favicon can be the site logo as well. To add a site logo, hover the mouse over the site’s title in the upper-left corner of the Google Sites editor.

Keep it Fresh with Google Sites Newest Features
There are two new Google Sites features that add new design and organization elements to sites.
Tables of Contents
Tables of contents have the potential to be a visually pleasing way to organize site content. Have a look at this animated GIF from Google’s blog post about Google Sites tables of contents:

Image Carousels
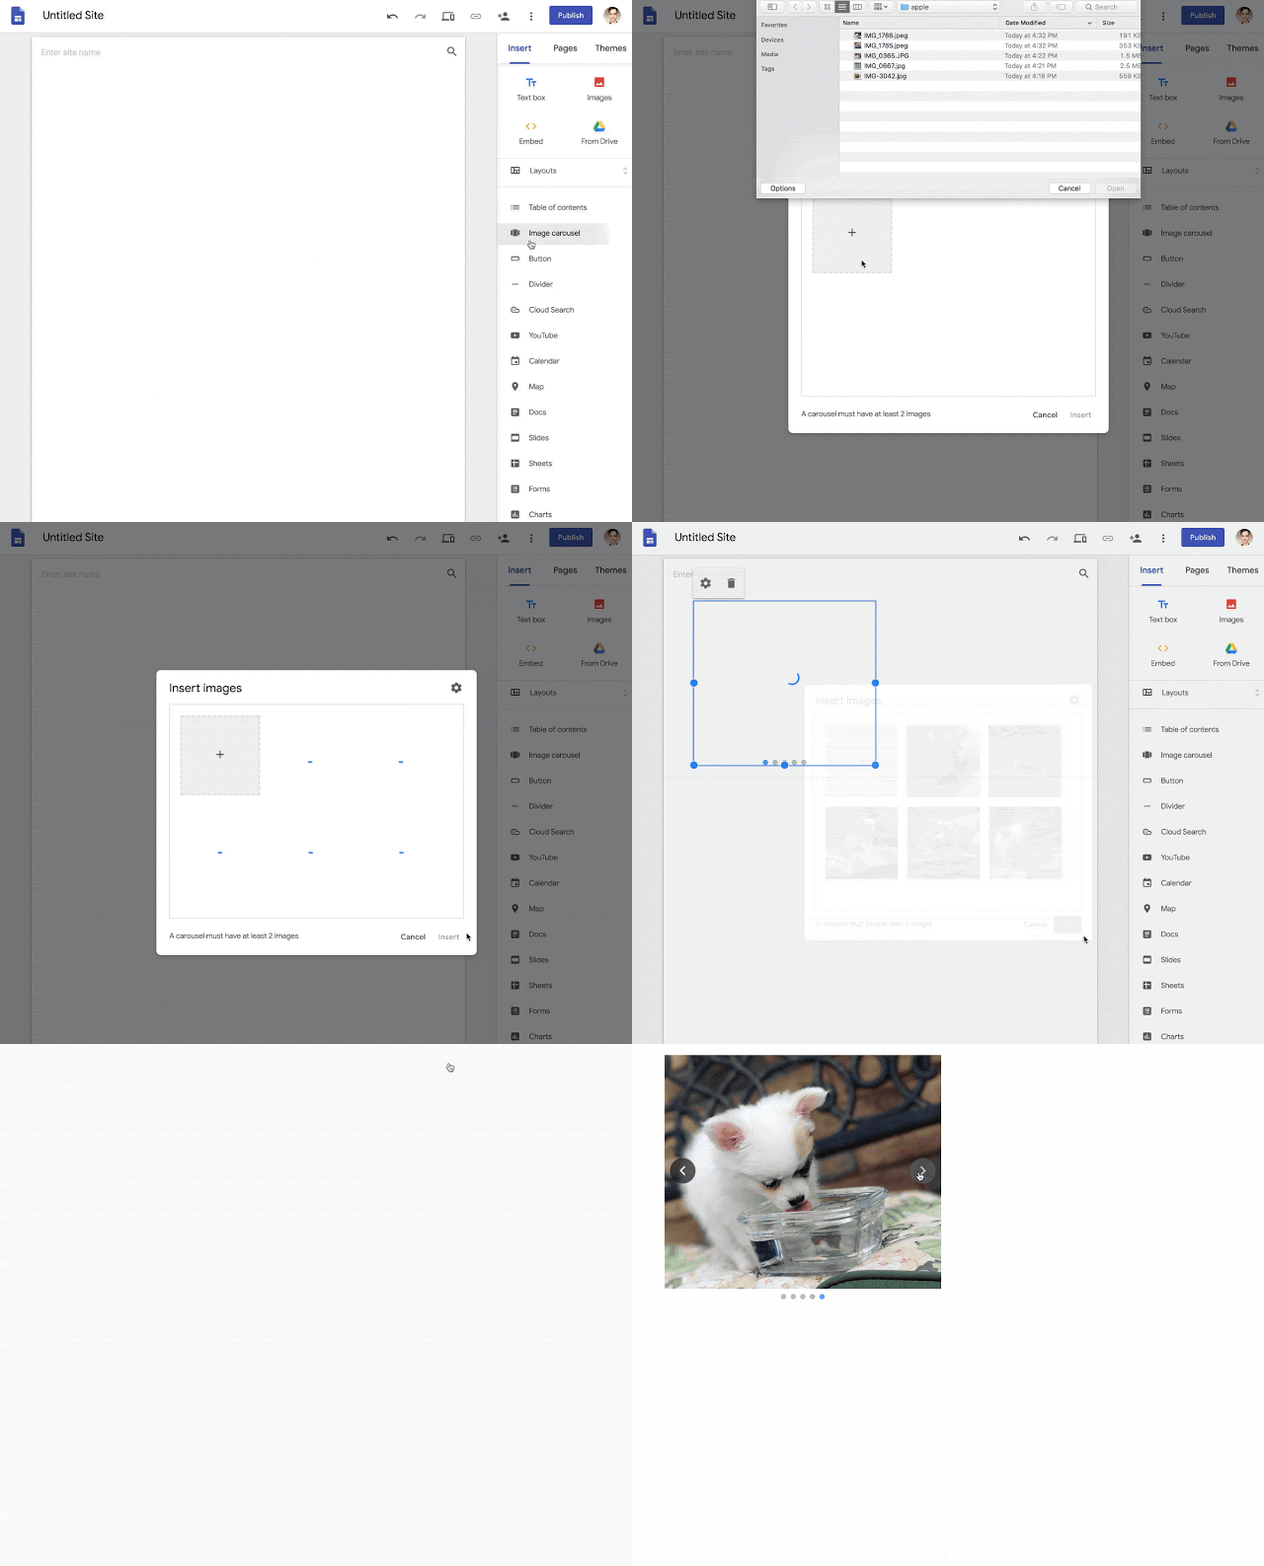
As of 2019, image carousels on websites are in style. They are finally available in Google Sites! Have a look at this animated GIF from Google’s blog post about Google Sites image carousels:

Have a look at this image carousel:

For more information about how to create image carousels, please watch this video:
What do you think? Are you going to make some changes to your Google Sites? Let me know or tell me how bad my Google Sites are in the comments below or tweet me, @TomEMullaney. Learn more about raising your Google Sites game in part 2 of this post which addresses Google Sites embeds.
Does your school, organization, or conference need professional development to help teachers make the most of Google Sites? Have a look at some of my offerings and connect with me on Twitter.
Photo by Ihor Dvoretskyi on Unsplash.


Leave a comment